Layering necklaces is a simple way to look polished without seeming overdone. The trick is not to pile on random pieces, but to combine a few intentional choices. These three rules — lengths, textures/weights, and a clear focal point — will give you that effortless, celebrity-inspired look while explaining exactly why each decision matters.
Rule 1 — Vary lengths and position them with intent
Different necklace lengths create visual steps. That keeps each piece visible and prevents tangles. Common lengths to know:
- Choker: 14–16 inches (35–41 cm) — sits at the base of the neck.
- Princess: 18 inches (46 cm) — rests on the collarbone.
- Matinee: 20–24 inches (51–61 cm) — falls a few inches below the collarbone.
- Opera: 28–36 inches (71–91 cm) — a longer layered anchor.
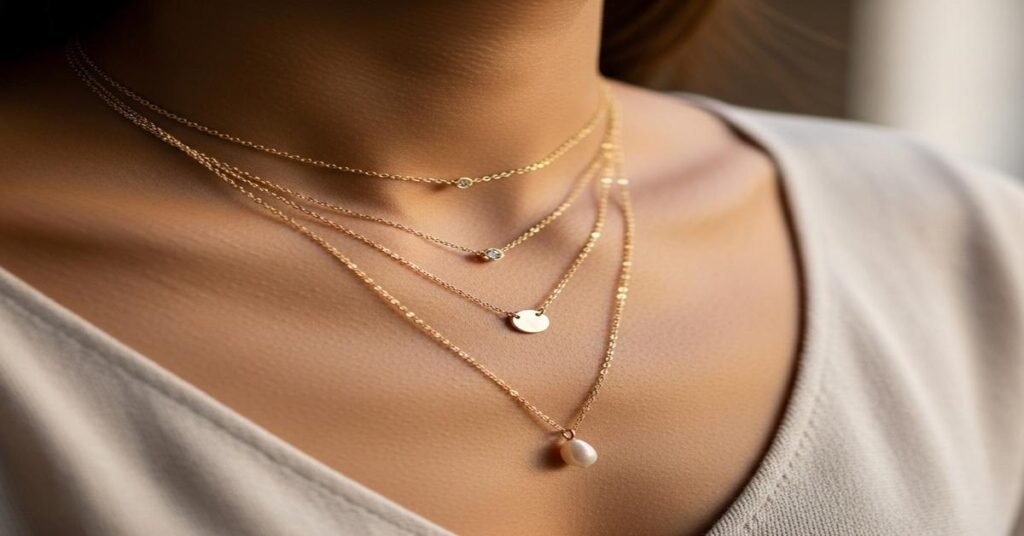
How to space them: aim for about 2–4 inches (5–10 cm) between focal points. Example set: a 16″ choker, an 18″ pendant, and a 24″ chain. That spacing gives each piece room to read at a glance.
Consider neck size and outfit. On a short neck, avoid a tight 14″ choker plus many longer pieces — it crowds the throat. For a V-neck top, let the longest piece follow the V line for balance. For high necklines, focus on shorter lengths and fine textures so the jewelry doesn’t compete with fabric.
Rule 2 — Mix textures and weights deliberately
Mixing chain types and weights makes a layered look feel curated. Different textures reflect light differently and keep the eye moving. Here’s why and how to do it:
- Chain types: cable and box chains are delicate and sit close; curb and rope chains are chunkier and anchor the set; snake chains are smooth and modern. Combine one bold chain with one or two finer chains.
- Specific sizes: a delicate chain is often 0.6–0.9 mm; a medium everyday chain is 1.2–1.5 mm; a statement chain is 2–3.5 mm. Example combo: 0.7 mm cable (16″) + 1.2 mm box with tiny stations (18″) + 2.5 mm curb (28″).
- Weight and hardware: heavier pendants need stronger jump rings and a lobster clasp. If a pendant is over 5–8 grams, pair it with at least a 1.5 mm chain and reinforced jump rings to avoid breakage.
- Metal considerations: 14k gold (about 58.3% gold) is harder and more durable than 18k (75% gold), so 14k is a practical choice for layered pieces you’ll wear every day. Sterling silver (92.5% Ag) is affordable but will tarnish; consider gold-filled or vermeil if you want gold look at a lower cost. Avoid mixing heavily plated pieces with high-wear items because plating wears off where chains rub.
Why this works: texture contrast gives structure. A chunky curb anchors the look and prevents the fine pieces from disappearing. Fine chains add delicacy without competing.
Rule 3 — Choose one clear focal point and make others supportive
Every successful layered set has one star. That can be a pendant, an eye-catching gemstone, or a bold chain. The supporting pieces should echo it without competing.
- Focal sizes: small, subtle focal points are about 6–12 mm (coins, petite gemstones). Bold focal pieces range 15–30 mm (large medallions or statement gemstones). Use a petite focal if you want understated celebrity-minimal style; pick a larger pendant if you want a red-carpet feel.
- Gemstone balance: accent diamonds or gems of 0.05–0.25 ct work well as supporting sparkle. Reserve 0.5 ct and up for the focal stone. Multiple small stations (for example, 10 tiny 0.02 ct diamonds spaced along an 18″ chain) add luxe detail without stealing focus.
- Shape and motif: pair different shapes for interest. A vertical bar pendant reads well with a round coin or a short choker. Avoid stacking three similarly sized round pendants — they compete visually.
How to arrange: place the focal piece in the middle or the longest position depending on its size. If it’s heavy, put it on the longest chain so the weight hangs naturally and doesn’t pull on the shorter necklaces.
Practical finishing touches
Small details make the look last and feel intentional:
- Start with clamps: connect pieces in order when you first try them on. Hook the longest on first, shortest last. This reduces tangles while you adjust.
- Use extenders: add a 2–4 inch extender to one or two chains. That lets you tweak spacing without buying new lengths.
- Invest in hardware: good lobster clasps and thicker jump rings prevent breakage. Reinforced rings (1.2–1.5 mm) are worth the extra cost for pendants that move a lot.
- Care: store layered sets flat or on a multi-chain board to avoid knots. Keep plated pieces away from perfumes and sweat; these accelerate wear. Clean gold with warm soapy water; silver benefits from gentle polishing to remove tarnish.
- Try it in motion: tilt your head and move. A layered look should stay readable. Take a photo in the outfit you plan to wear; camera images reveal overlaps you might miss in the mirror.
Quick checklist before you walk out
- Three or fewer main pieces for a clean look.
- Different lengths (2–4″ spacing) so each piece is visible.
- Mix one bold weight/texture with finer chains for contrast.
- One clear focal piece sized to your body and neckline.
- Secure clasps and appropriate jump-ring thickness for pendant weight.
Follow these rules, and layering becomes a practice, not guesswork. You’ll get that effortless, celebrity-inspired look that reads as intentional and wearable—every day.
I am Satyam Pandey, a gemologist with a Diploma in Polished Diamond Grading from KGK Academy, Jaipur. I love writing about jewelry, gems, and diamonds, and I share simple, honest reviews and easy buying tips on JewellersReviews.com to help you choose pieces you’ll love with confidence.