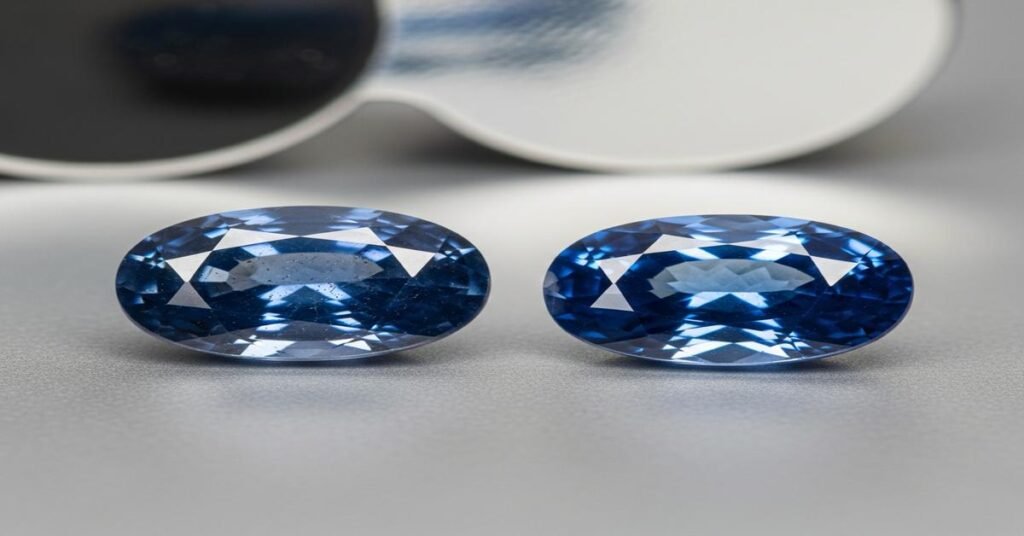
Sapphires are prized for their durability and color, but telling a natural stone from a lab-grown one can be tricky. Both are real corundum (aluminum oxide) with the same hardness, density, and refractive index. The differences lie in how they form and what that leaves behind. This guide shows you how experts tell them apart, why each test works, and what you can do at home versus what needs a lab.
What “real” means: natural, treated, lab-grown, and imitation
Natural sapphire: Formed in the earth. Often heat-treated to improve color and clarity. Still considered natural.
Lab-grown sapphire: Grown by humans (flame-fusion, flux, hydrothermal, or pulled). Chemically the same as natural corundum. Not an imitation, but not formed in nature.
Imitation: Any non-corundum material, like glass or synthetic spinel, made to look like sapphire.
The key is not whether the material is “real corundum” (both natural and lab-grown are), but how it grew. Natural growth leaves different internal features than factory growth.
Tools you can use at home (and what they reveal)
- 10× loupe or simple microscope (20–40×): The most useful tool. It reveals inclusions, growth lines, and color zoning.
- Bright, focused light: A small LED flashlight helps you see zoning and inclusions.
- Immersion setup: A clear glass of water or glycerin to reduce surface glare. This makes zoning and surface diffusion easier to see.
- UV flashlight (longwave, ~365 nm): Fluorescence can offer clues, but it is not conclusive by itself.
- Optional: dichroscope and spectroscope: Helpful for learning, but they rarely separate natural from lab-grown sapphires on their own.
Specialized instruments like Raman, FTIR, or LA-ICP-MS are lab tools. Use them when the stone is valuable or the visual clues conflict.
Step-by-step workflow to separate natural from lab-grown
- 1) Rule out imitations first. Look for telltale glass features: round gas bubbles of different sizes, swirly flow lines, and soft facet edges. Glass has lower density; a large stone may feel surprisingly light.
- 2) Check for growth zoning with a loupe under bright light. Rotate the stone. Natural sapphires often show angular or hexagonal color zoning. Flame-fusion synthetics often show curved color banding or curved growth lines.
- 3) Examine inclusions. Natural stones show a variety: needle “silk,” tiny crystals, fingerprint (healed) inclusions. Lab-grown stones show patterns tied to the growth method: gas bubbles and curved lines (flame-fusion), flux “veils” (flux-grown), or sharp chevron zoning (hydrothermal).
- 4) Look for treatment clues. Dissolved or “fuzzy” rutile silk and discoid fractures suggest heat treatment. Color concentrated at facet edges or along surface-reaching features suggests surface diffusion.
- 5) Use UV as a supporting clue. Irregular bright, chalky fluorescence can point to certain synthetics, but many natural sapphires also fluoresce weakly or not at all. Treat this as supportive, not decisive.
- 6) If still unsure, seek a lab report. For expensive stones, a reputable lab can confirm origin and treatments.
Natural sapphire hallmarks under magnification (and why they matter)
- Rutile “silk” needles: Fine, intersecting needles that can form stars in star sapphires. These crystallize slowly in nature. Heat can dissolve or “soften” them. Intact, crisp silk strongly supports natural origin.
- Angular or hexagonal zoning: Color bands and growth lines that meet at angles or trace hexagonal outlines. Nature builds sapphire layer by layer against crystal faces, producing straight or angular patterns, not curves.
- Mineral crystals and “fingerprints”: Tiny included crystals (e.g., zircon, spinel) and healed fissures that look like fingerprints. These are typical of geological growth and pressure changes over time.
- Partially healed feathers with “wisps”: Natural stress features that have healed from heat and pressure in the earth.
No single inclusion proves natural origin, but a mix of these in the same stone is strong evidence.
Lab-grown sapphire telltales by growth method
Flame-fusion (Verneuil):
- Curved color banding or curved growth lines: The melt builds in layers as it rotates under the flame, leaving arcs. Nature does not create curved zoning in sapphire.
- Gas bubbles: Often round or elongated along growth lines. Natural stones rarely show perfect round bubbles.
- Even color and high clarity: Too perfect can be a clue, especially in large, inexpensive stones.
Flux-grown:
- Flux “veils” and residues: Wispy, reflective patches or fingerprint-like veils with a smeared look; sometimes glittery particles from the flux. These are remnants of the high-temperature solvent.
- Angular zoning is possible, but inclusions look “fluxy”: The zoning can mislead, so rely on the veils and reflective flux particles.
Hydrothermal:
- Chevron or zig-zag growth patterns: Repeating V-shaped zoning under magnification or in immersion.
- Nail-head spicules and thin veil-like features: Diagnostic in some specimens. Internal features look different from natural healing textures.
Pulled (Czochralski) synthetics:
- Curved striae and occasional metallic platelet inclusions: Tiny reflective platelets can come from the platinum crucible; curved growth is again a warning sign.
Treatments that complicate the picture
- Heat treatment: Common and accepted. It can dissolve rutile silk (silk looks fuzzy or partially melted), reduce blue-gray zoning, and create discoid stress fractures around crystals. A natural stone can look “cleaner” after heat, so absence of silk does not mean synthetic.
- Surface diffusion (e.g., titanium): Blue color concentrated near the surface. In immersion, you may see a darker rim near facet junctions, stronger color in chips and abrasions, or color following surface-reaching tubes. This is still natural corundum, but the color at the surface was added artificially.
- Beryllium diffusion: Can penetrate deeply and modify body color. Visual detection is difficult; lab testing (e.g., LA-ICP-MS) is often required.
Why this matters: treatments change inclusions and zoning. Misreading these can make a natural heated sapphire look synthetic, or vice versa. Always weigh multiple clues.
Tests that do NOT separate natural from lab-grown (and why)
- Hardness/scratch tests: All corundum is Mohs 9. Scratching risks damage and proves nothing about origin.
- Refractive index and specific gravity: Natural and lab-grown corundum share RI ~1.76 and SG ~4. These tests help detect imitations, not origin.
- Diamond testers/thermal probes: Designed for diamond, not corundum. Results are meaningless here.
- Pleochroism with a dichroscope: Both natural and synthetic sapphires show two shades (e.g., blue and greenish/gray). Not diagnostic.
- UV fluorescence: Variable. Some synthetics glow strongly, others do not; some naturals glow weakly. Use only as supporting evidence.
Imitations to rule out first
- Glass: Round bubbles, flow lines, soft facet edges, abrasions that look “melted.” Often vivid cobalt blue with a “too even” look. Under UV, some glass shows bright glow; not conclusive but a hint.
- Synthetic spinel or blue cubic zirconia: Different RI/SG and typical inclusions (e.g., octahedral crystals in CZ). CZ is heavier; a small stone feels “heavy for size.”
- Doublets/triplets: Look for a seam when viewed from the side; color may concentrate at the join. In immersion, the boundaries become obvious.
Real-world examples
- Loose oval “Ceylon blue” looks very clean, strong royal color, low price: Under 10× you see curved blue bands and a few round bubbles. Verdict: flame-fusion synthetic.
- Vintage ring with medium blue oval, faint silk visible in a cross-hatched pattern: Angular zoning in immersion, some tiny crystal inclusions, no curved lines. Silk is slightly softened. Verdict: natural sapphire, likely heat-treated.
- Bright blue stone with color darkest at facet edges and in tiny chips: In immersion, a darker rim hugs the surface. Verdict: surface diffusion-treated natural corundum.
Working with mounted stones
Settings hide clues and create reflections. Try these:
- Use oblique lighting from the side to spot zoning and inclusions.
- View through the crown and pavilion at different angles; rotate slowly.
- If the piece is valuable, have a jeweler temporarily unmount it for a proper exam.
When to get a lab report
- If the stone is expensive or the seller’s claim affects price (e.g., “untreated Kashmir”).
- If you suspect beryllium diffusion or need confirmation of treatment status.
- If inclusions are ambiguous (e.g., clean stone with no clear natural or synthetic markers).
A reputable gem lab can confirm natural vs lab-grown and identify treatments using advanced spectroscopy and microscopy.
Ethics and value: be clear about what you’re buying
Lab-grown sapphires are durable, beautiful, and often affordable. They are not “fake,” but they should be disclosed as laboratory-grown. Natural sapphires, especially with desirable origin or minimal treatment, command higher prices. Transparent disclosure protects you and builds trust.
Quick reference checklist
- Curved lines or curved color bands? Think flame-fusion synthetic.
- Flux veils or glittery residue? Think flux-grown synthetic.
- Chevron zoning and hydrothermal textures? Think hydrothermal synthetic.
- Angular/hexagonal zoning, rutile silk, natural fingerprints? Favors natural.
- Dissolved silk and discoid fractures? Likely heat-treated natural.
- Color rim near surface, stronger color in chips or along facet edges? Surface diffusion-treated.
- Round bubbles, flow lines, soft facet edges? Glass imitation.
- Still uncertain on a valuable stone? Get a lab report.
The best identifications combine multiple observations: zoning shape, inclusion type, distribution of color, and treatment effects. With a loupe, good lighting, and patience, you can separate most natural sapphires from lab-grown ones. For edge cases, a professional lab provides the final word.
I am Satyam Pandey, a gemologist with a Diploma in Polished Diamond Grading from KGK Academy, Jaipur. I love writing about jewelry, gems, and diamonds, and I share simple, honest reviews and easy buying tips on JewellersReviews.com to help you choose pieces you’ll love with confidence.