Coral jewelry is beautiful but tricky to verify. Real coral is an organic gemstone made of aragonite (a form of calcium carbonate) built by marine animals. Today you’ll also see “lab-grown,” “reconstituted,” “stabilized,” and dyed alternatives that look convincing. This guide explains how experts tell them apart and why each test works, from simple at-home checks to lab methods.
What “real” vs “lab‑grown” coral means
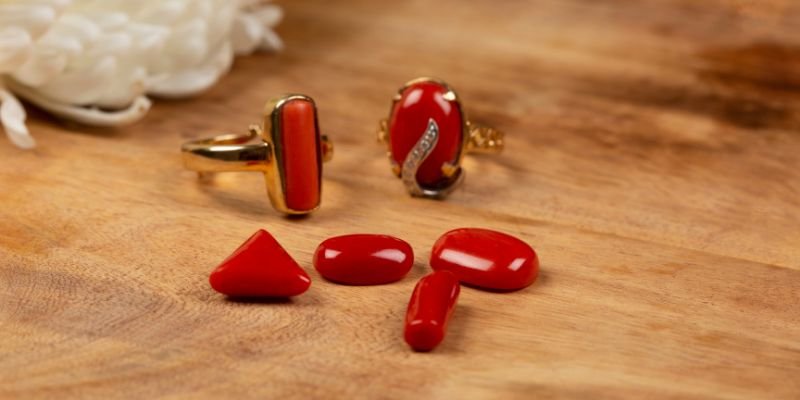
Real (natural) coral: Branches or pieces of coral skeleton cut and polished as-is, with only routine cleaning and shaping. Common types in jewelry are red and pink “precious coral” (Corallium species) and white/cream coral.
Cultured (farmed) coral: Coral grown in the sea or controlled farms from fragments. Gemologically it’s the same material as wild coral, so you cannot distinguish it from natural by standard tests.
Lab‑grown or man‑made look-alikes usually means one of these:
- Reconstituted (pressed) coral: Coral powder or small chips mixed with resin and dye, then molded. Looks uniform; microscopically shows granules held by polymer.
- Stabilized/impregnated coral: Porous coral (often bamboo coral) filled with polymer and dyed to mimic precious coral. The polymer adds weight and closes pores; dyes create strong color.
- Non-coral imitations: Plastic or resin, glass, dyed bone, calcite/magnesite/howlite, ceramic. These mimic color and surface but lack coral’s internal structure.
Why this matters: Tests that confirm aragonite tell you it’s carbonate-based, not plastic—but they don’t prove it’s natural precious coral. The goal is to determine both material and treatments.
Quick telltales at a glance
- Color uniformity: Natural precious coral often shows gentle unevenness, faint streaks, or “clouds.” A perfect, flat, neon red or candy pink often signals dye or reconstituted material. This happens because natural pigment distribution in coral isn’t perfectly even.
- Surface “life marks”: Look for tiny pits, faint longitudinal striations, and occasional white specks or “eyes.” These reflect coral’s canal system and growth texture. Reconstituted material smooths these out; plastic/glass often look too perfect.
- Drill holes and edges: At bead holes and chips, natural coral’s color may lighten slightly; dyed material often shows concentrated pigment in cracks and holes where dye pooled.
- Feel: Coral feels cool but warms in the hand, with a “stone-like” touch. Plastic feels warmer and “softer” immediately; glass stays colder and has a higher “ring” when tapped together.
Magnification: what to look for
A 10× loupe or, better, a 20–40× microscope is the most useful non-destructive tool.
- Natural coral: Look for faint longitudinal striae (parallel lines along growth), tiny pores and canals, and subtle grain. Cross-sections may show radial patterns. These arise from the biological skeleton architecture.
- Reconstituted coral: You’ll see discontinuous granules or “crumbs” with resin “rivers” between them. Boundaries between particles look irregular. The texture looks composite because it is.
- Stabilized/impregnated coral: Pores look filled; surface can appear “glassy” in pits. Under higher power, you may see a thin polymer film along cracks.
- Dyed coral or dyed non-coral: Look for peppery dye specks, color concentrating in voids, and streaks along fractures. Natural color transitions tend to be soft, not spotty.
- Plastic/resin: Mold lines, tiny trapped bubbles, or flow lines. The surface scratches differently—broad, smeary abrasions instead of crisp, granular chips.
- Glass: Swirls, gas bubbles, sharp luster, and a conchoidal (glassy) chip surface; no organic canals.
Why it works: Biological growth leaves diagnostic microstructures. Industrial processes erase or replace them with patterns of molding, pressing, or binding.
Color clues and dye detection
- Real color ranges: Precious coral runs from pale pink (“angel skin”) through salmon and orange to medium and dark red (“oxblood”). Expect slight mottling. A single, strong, fire-engine red throughout is suspect.
- Acetone swab test (cautious use): Dab an unseen area with acetone on a cotton swab. If the swab picks up color, it’s dyed. Do not rub polished faces or set pieces; acetone can dull polymer finishes and affect mounting adhesives.
- Check the string hole: On beads, inspect inside holes. Intense color rings or bleed lines indicate dye concentration.
Why it works: Dyes penetrate along pores and cracks, accumulating where access is easiest, unlike natural pigmentation formed during growth.
Weight, temperature, and hardness
- Specific gravity (SG): Natural coral is ~2.6–2.7. Plastics are ~1.1–1.4 (noticeably light). Glass can be ~2.4–2.6. A simple water displacement test on a loose piece can flag plastic; it will feel too light for its size.
- Hardness: Coral is soft (Mohs ~3–4). It scratches more easily than glass. Avoid scratch tests on jewelry; they damage the surface. Knowing coral’s softness helps you spot glass imitations, which won’t show the same wear.
- Temperature feel: Coral feels cooler than plastic at first touch because it conducts heat better. Glass feels cold longer and has a sharper luster.
Why it works: Different materials have different densities and thermal properties. Even without instruments, your hand can sense these differences after some practice.
UV light behavior
- Natural coral: Often weak to inert under longwave UV. Some white and pink corals can show a soft, uneven glow.
- Dyed/stabilized coral: Dyes or polymers can fluoresce stronger—commonly blue, green, or chalky. The glow may outline filled fractures or pores.
- Plastic/resin: Frequently shows bright, even fluorescence and looks featureless inside.
Why it works: Organic dyes and polymers often contain fluorescent compounds, while aragonite alone is generally subdued under UV.
Advanced lab tests (when certainty matters)
- Raman spectroscopy: Confirms aragonite by a strong band near 1085 cm⁻¹. Distinguishes plastic/glass quickly. It cannot by itself separate natural from cultured because both are aragonite.
- FTIR/IR spectroscopy: Detects polymer impregnation in stabilized or reconstituted coral, revealing organic binder signals alongside carbonate bands.
- X-radiography or micro‑CT: Visualizes internal canal systems and filled areas. Reconstituted pieces show granular textures and resin-filled gaps.
- Dye analysis: UV‑Vis spectra or chromatographic tests identify dye molecules.
- Isotopic and trace analysis: Sometimes used for provenance or to detect reassembly; generally more research‑grade than retail.
Why it works: Each method targets a different property—crystal structure, organic compounds, or internal architecture—building a complete picture.
Step-by-step home workflow
- 1) Observe in daylight: Note color evenness, surface pits/striations, and any white flecks. Suspicion rises with perfect uniformity and high‑gloss plastic-like surfaces.
- 2) Loupe at 10×: Inspect drill holes, edges, and any chips. Look for canals, dye concentrations, or composite granules with binder.
- 3) Weigh and handle: Gauge heft vs size. Too light suggests plastic; too glassy and cold suggests glass.
- 4) UV check (if available): Note fluorescence. Strong, even glow hints at polymer or dye.
- 5) Gentle acetone swab: Only on an inconspicuous area of a loose piece. Stop if finish softens.
- 6) Decide on lab testing: For costly items, seek a gemological report to confirm treatment and composition.
Common look-alikes and how to separate them
- Plastic/resin: Warm to touch, very light, mold seams or bubbles under magnification, often bright UV response, soft smeary scratches. Hot needle gives plastic odor—but avoid on finished pieces.
- Glass: Heavier feel than plastic, colder, sharp vitreous luster, gas bubbles, swirl lines, conchoidal chips. No organic canals; often no dye pooling in holes.
- Dyed bone or shell: Displays Haversian systems (bone) or layered structure (shell) under magnification, different pore patterns than coral. Dye often emphasizes pores.
- Calcite/magnesite/howlite dyed red or pink: Strong veins/matrix, larger pores, different luster. Acids react vigorously on calcite, but this is destructive—do not test on jewelry.
- Bamboo “coral” (sea whip) dyed and stabilized: Shows linear pores, often filled; bright, even colors; polymer signals on FTIR. Under loupe, pores look more regular than precious coral.
Documentation, ethics, and buying tips
- Ask for full disclosure: Is it natural, dyed, stabilized, or reconstituted? “Genuine coral” can legally refer to reconstituted coral; seek clarity.
- Prefer detailed invoices: The written description should match what you see (e.g., “angel skin natural coral, untreated,” or “bamboo coral, polymer‑stabilized, dyed red”).
- Regulations: Some corals are protected under trade rules. Reputable dealers should know the species and its status.
- Value signals: Fine natural precious coral with even but natural color, clean polish, and good size commands higher prices. If the price is far below market, expect dye or reconstruction.
- Independent reports: For expensive pieces, a gem lab report protects your purchase and resale value.
Care and handling
- Avoid acids and harsh cleaners: Coral is calcium carbonate; acids etch it. Even perspiration and cosmetics are mildly acidic—wipe pieces after wear.
- Keep from heat and strong light: Heat can damage polymers and lighten dyes; natural coral can also fade slightly with prolonged UV exposure.
- Store softly: Coral is soft; store separately to prevent scratches. Avoid ultrasonic and steam cleaners.
- Re-polishing: Light scratches can often be polished by a professional; disclose any suspected treatments to avoid damaging polymer‑stabilized surfaces.
Bottom line: No single clue is definitive. Combine microstructure (canals and striae), color behavior (mottling vs dye pooling), physical feel (density, temperature), and UV response to form a judgment. When the stakes are high, lab spectroscopy and imaging settle the question. That’s how experts separate natural coral from lab‑made and treated look‑alikes with confidence.
I am Satyam Pandey, a gemologist with a Diploma in Polished Diamond Grading from KGK Academy, Jaipur. I love writing about jewelry, gems, and diamonds, and I share simple, honest reviews and easy buying tips on JewellersReviews.com to help you choose pieces you’ll love with confidence.