Lapis lazuli is one of the oldest gemstones used by people. It is not a single mineral. It is a rock made mostly of lazurite, with calcite and pyrite mixed in. That mix gives natural lapis its famous deep blue, along with white veins and gold flecks. Today you can also buy lab-grown (synthetic) lapis and many blue imitations. Telling them apart is not hard if you know what to look for and why it matters. This guide walks you through practical checks, from quick visual cues to simple at‑home tests, and explains the science behind each sign.
What “real” lapis lazuli is—and what it isn’t
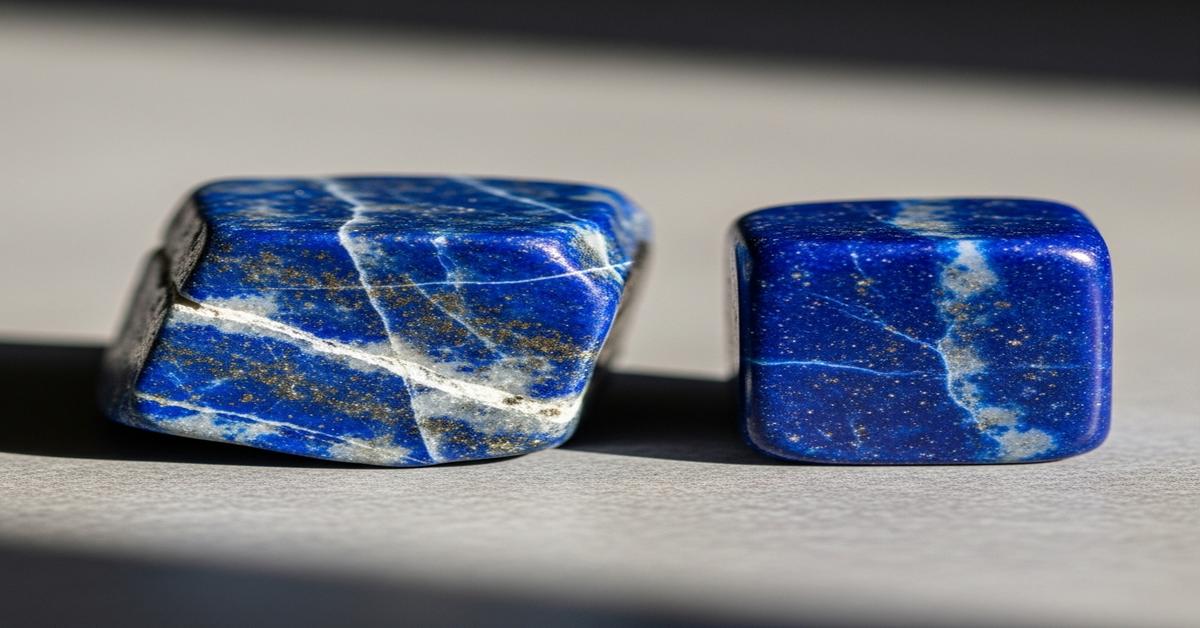
Natural lapis lazuli: A metamorphic rock. Its blue color comes from lazurite. White areas come from calcite. Gold-colored specks are pyrite. Because it is a mix, color and texture are never perfectly even. Afghan lapis often shows rich, uniform blue with light pyrite. Chilean lapis has more calcite, so it looks lighter or mottled.
Lab-grown (synthetic) lapis: Man‑made material designed to mimic lapis. The most known type (e.g., Gilson) recreates lazurite-like chemistry and often adds metallic flakes to imitate pyrite. Because it is engineered, color and “inclusions” tend to be too even.
Imitations: Dyed howlite or magnesite, dyed marble/calcite, sodalite, glass, resin composites. These are not lapis. They often give themselves away by bubbles, dye in cracks, or missing pyrite.
Fast triage: 60-second checks
- Color evenness: Natural lapis rarely looks airbrushed. Expect subtle clouds, fine grain, and small shade shifts. Lab-grown is often a smooth, “painted” royal blue.
- Pyrite behavior: Natural pyrite forms sharp, angular specks or tiny cubes with a metallic flash. Lab-grown often shows flat, rounded glitter-like flakes, too regular in size and spacing.
- Calcite presence: Tiny white veins or patches are common in natural stones. Perfectly blue stones with zero calcite and “too perfect” pyrite are suspect.
- Price vs quality: High-quality natural lapis is not cheap. A large piece with flawless color and uniform “pyrite” at a low price is usually synthetic or dyed.
Step-by-step identification at home (non-destructive first)
Work in good daylight. A 10x jeweler’s loupe is the single most useful tool.
- 1) Look at the blue—carefully. Natural lapis shows a deep blue with slight variation. Why: it is a granular rock, not a single crystal. Lab-grown aims for an even ultramarine. If the piece is a perfect, flat blue with no subtle grain, question it.
- 2) Study pyrite under 10x. In natural lapis, pyrite grains look brassy and angular, often square-ish or in short streaks. Faces can appear straight and reflective. Why: pyrite crystallizes in cubes and pyritohedra. In lab-grown material, metallic flakes are commonly thin, rounded, and lie flat like glitter. They may all be similar size and evenly scattered.
- 3) Find calcite. Natural pieces often include white calcite veins or islands. Borders between blue and white look “natural,” with irregular boundaries and slight translucence at edges. Lab-grown tends to avoid obvious calcite or shows artificial-looking, sharply bounded patches.
- 4) Surface and texture. Natural lapis takes a good polish but often shows tiny pits or a waxy sheen in places, especially where calcite is present. Why: different minerals polish differently. Lab-grown can look glassy and uniform from edge to edge.
- 5) Check for dye concentration. Use the loupe to inspect pores, edges, drill holes, and around white veins. If blue color pools in tiny cracks or outlines grains, it is dyed. Why: dyes wick into micro‑fractures. Lab-grown and glass won’t show this pattern.
Simple tests you can do with caution
- Acetone swab test (for dye): Lightly rub an inconspicuous area with a cotton swab dampened with acetone or alcohol. If the swab turns blue, the stone is dyed. Do not do this on valuable jewelry, inlay, or porous settings without consent. Why: natural color is inside the minerals; surface dyes dissolve.
- Streak test: On unglazed white porcelain, natural lapis usually leaves a pale blue streak. Sodalite and many imitations leave white. Heavy pyrite might tint the streak slightly grayish, but the overall impression should be blue. Test a small, hidden area only.
- Hardness feel: Lapis is Mohs ~5–6. A steel knife (~5–5.5) may scratch calcite areas more easily than blue areas. This uneven response is normal in natural lapis. If the whole surface scratches very easily like chalk (Mohs ~3), it is likely dyed calcite or howlite. Avoid aggressive scratch tests on finished pieces.
- Weight and “feel” check: Natural lapis has specific gravity ~2.7–2.9. Glass is ~2.5; resin composites are lighter still and often feel “warm.” Why: resin has low density and low thermal conductivity.
- UV reaction (if you have a UV lamp): Under longwave UV, calcite in natural lapis can glow weak to moderate orange to red in isolated patches. Synthetic lapis may show a stronger, more even orange response. Dyed stones and resin often glow bright, chalky, or uneven colors. Use this as supporting evidence, not a sole decision.
What lab-grown lapis typically shows
- Too-uniform blue: The color is rich but flat, with minimal grain or clouding. Why: consistent chemistry and controlled manufacture.
- Pyrite look-alikes: Metallic flecks appear thin and round, like confetti. Spacing is suspiciously regular. Under magnification, edges are soft rather than crisp and angular.
- “Spongey” microtexture: Some synthetics show a fine, mottled, foam-like pattern in the blue when viewed at 10x–20x, unlike the granular texture of natural rock.
- Scarce natural calcite features: Either no white veining at all, or “decorative” patches that look placed rather than grown.
- Stronger, even UV fluorescence: A more uniform orange glow than the patchy calcite response in natural stones.
Common imitations and how to spot them quickly
- Dyed howlite/magnesite: Spiderweb veining, very porous. Blue dye gathers in veins and pits. Scratches easily (Mohs ~3.5). No pyrite flecks.
- Dyed calcite/marble: Vivid, artificial blue with white patches. Blue rubs off with acetone. Often chalky polish in white areas.
- Sodalite: Naturally blue with white, but typically no gold pyrite. Streak is white. Often fluoresces orange under UV. Good stone, but not lapis.
- Glass: Bubbles and swirl lines under magnification, conchoidal (curved) chips on edges, uniform color, no granular structure. Metallic “flecks” may be foil-like.
- Reconstituted/resin composite: Chips or powder bound in resin. Mosaic look under magnification, trapped bubbles, and a plastic-like luster in low spots. Feels lighter and warms quickly in hand.
Why these tests work
- Geology sets the fingerprint: Natural lapis forms as a rock with multiple minerals. That guarantees small irregularities—grain, veins, and uneven hardness.
- Engineering seeks perfection: Lab-grown materials aim for a flawless look. Uniform blue and regular “pyrite” placement are by-products of controlled manufacture.
- Dyes behave predictably: They collect in pores and cracks and dissolve in solvents. Natural color does not wipe off.
- Crystals keep their habits: Pyrite’s cubic habit shows up as sharp, angular specks in natural lapis. Flattened, rounded metallic particles point to man-made additions.
Advanced gem lab clues (if you have the tools)
- Refractometer: Natural lapis gives a spot RI around 1.50. This alone does not separate synthetic, but it rules out glass with different RI ranges.
- Microscope (20x–40x): Confirms granular rock texture, true pyrite crystals, and dye in fractures. Synthetics often reveal a uniform, constructed microtexture.
- Raman/FTIR: Confirms mineral identity and can detect resins or dyes. This is how labs make definitive calls.
Buying tips to avoid surprises
- Ask precise questions: Is it natural, synthetic, or dyed? Vendors should know. “Genuine lapis” should mean natural, not lab-grown.
- Inspect with a loupe: Look for natural pyrite shapes and subtle grain. Walk away from perfect blue with glitter-like flecks at a suspicious price.
- Prefer transparent labeling and return policies: Sellers who disclose treatments and offer returns are safer.
- Get a lab memo for high-value pieces: For costly items, an independent gem report is worth the fee.
Quick reference: natural vs lab-grown signs
- Natural lapis: Deep blue with subtle variation; angular pyrite flecks; some calcite veins or spots; granular texture; pale blue streak; patchy orange/red UV in calcite areas; no dye bleed.
- Lab-grown lapis: Very even royal blue; rounded or plate-like metallic flakes, evenly distributed; little to no true calcite veining; smoother, uniform polish; often stronger, even orange UV; no dye bleed but “too perfect” overall.
Use multiple clues together. No single observation proves identity in every case. Start with the loupe and look for natural texture, real pyrite crystals, and honest irregularity. Then back up your judgment with simple tests like acetone, streak, and UV if available. When in doubt, a gem lab can provide a definitive answer.
I am Satyam Pandey, a gemologist with a Diploma in Polished Diamond Grading from KGK Academy, Jaipur. I love writing about jewelry, gems, and diamonds, and I share simple, honest reviews and easy buying tips on JewellersReviews.com to help you choose pieces you’ll love with confidence.