Emeralds are among the most faked and confused gems. Lab-grown emeralds are chemically and optically the same species as natural emerald, but they grow in a factory, not the earth. That difference matters for value. This guide shows you how experts separate natural emeralds from lab-grown stones using practical tests and the reasons behind each clue.
What “real” means: natural vs lab-grown vs imitation
Natural emerald forms in the earth over millions of years. It carries a complex “fingerprint” of growth and inclusions from that process.
Lab-grown (synthetic) emerald is emerald too—beryl colored by chromium and/or vanadium—but grown by people in weeks or months. Two main methods are used: hydrothermal (crystal grows from a high-temperature watery solution) and flux (crystal grows from a molten solvent).
Imitation emerald is not emerald at all (e.g., glass, green cubic zirconia, synthetic spinel). These are easier to spot because their properties differ from emerald.
Quick checks you can do without tools
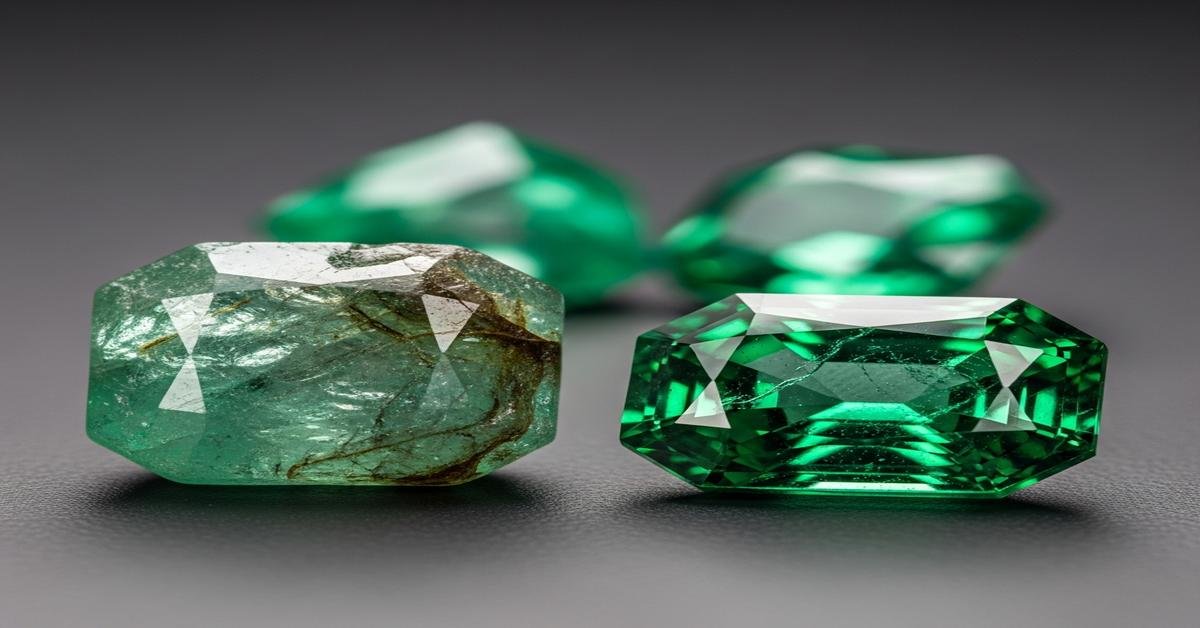
- Look for overly clean clarity. Natural emeralds almost always have inclusions (the classic “jardin”). A large, perfectly clean emerald is more likely lab-grown. Why: earth-formed crystals endure stress and entrap fluids; controlled lab growth reduces that.
- Check color uniformity. Intense, even “neon” green across the whole stone suggests lab-grown. Natural stones often show subtle zoning or patchiness. Why: factory growth conditions are consistent; nature is not.
- Watch the luster and facet edges. Glass imitations have a softer look and rounded facet junctions. Emeralds show crisp, vitreous luster. Why: glass is softer and polishes differently.
- Scan for join lines. A thin line around the girdle or between crown and pavilion can reveal an assembled stone (doublet/triplet). Why: parts are glued together to mimic a larger or finer emerald.
The 10x loupe test: what to look for
A 10x loupe plus a bright light solves most cases. Inspect slowly from the pavilion side and along any fractures.
- Natural “jardin.” Expect a mix of features, not just one type:
- Three-phase inclusions: a microscopic cavity with liquid, a gas bubble that moves, and a tiny crystal. This is a strong natural indicator because it forms in hydrothermal pockets in nature.
- Healed fissures: jagged “fingerprint” patterns where cracks resealed during growth.
- Mineral crystals: tiny pyrite cubes (metallic), calcite, mica, or amphibole needles. Host-rock minerals are a natural giveaway.
- Growth tubes: hollow tubes, sometimes with “rain-on-window” look when many are parallel.
- Hydrothermal synthetic clues.
- Chevron (zig-zag) growth zoning visible as V-shaped color bands when viewed through the table or pavilion. This regular pattern reflects steady directional growth in the autoclave.
- Seed plate junctions: a straight, flat boundary where growth started on a clear seed.
- Simple, limited inclusion types rather than a mixed natural “ecosystem.”
- Flux-grown synthetic clues.
- Flux veils and droplets: wispy, soft-edged, fingerprint-like inclusions that look “melted.”
- Metallic platelets (often platinum-like flecks) or angular particles from the crucible.
- Rounded inclusions with reflective surfaces, unlike the sharper, jagged fingerprints of natural healing.
- Filler flashes. Strong blue or orange flash colors confined to a fracture show resin-filled fissures. Natural emeralds are commonly oiled or resin-filled. This is a treatment clue, not an origin clue.
Microscope clues: natural vs hydrothermal vs flux-grown
At 20–40x, the patterns become clearer.
- Natural emerald shows diverse, irregular internal landscapes. Three-phase inclusions are randomly oriented and vary in size. Mineral inclusions sit at different depths and shapes; healed features have crisp, angular textures.
- Hydrothermal synthetic shows regular, parallel or chevron zoning, sometimes with straight-edged growth boundaries. Inclusions, if present, tend to be sparse and repetitive. The overall look is orderly.
- Flux-grown synthetic shows melt-residue textures: droplet-like features, wispy veils, and occasional reflective platelets. The scene looks “fluid” rather than crisp.
Why this works: each growth method leaves predictable features. Nature stacks layers irregularly with changing chemistry and stress; hydrothermal autoclaves feed nutrients in a steady direction; flux is a melt that leaves its own debris.
Color and zoning: useful but not decisive
- Natural emerald: green ranging from slightly bluish to slightly yellowish, often with soft, uneven zoning or core-to-rim variation. Why: fluctuating chromium/vanadium and iron during growth.
- Hydrothermal synthetic: evenly saturated, bright green with neat chevron or parallel bands.
- Flux-grown synthetic: rich, even color; sometimes a subtle “shell-like” growth from the seed.
Do not rely on color alone. Both origins can produce beautiful greens.
Simple instruments that settle most cases
- Refractive index (RI). Emerald is about 1.577–1.583, birefringence ~0.005–0.009. Natural and lab-grown overlap because they are the same species. Use RI mainly to rule out imitations (glass varies ~1.50–1.70; synthetic spinel ~1.727).
- Dichroscope. Emerald is strongly pleochroic: bluish-green and yellowish-green. Imitations often show weak or no pleochroism. Origin cannot be decided by this alone.
- Spectroscope. Chromium-bearing emeralds show red lines in the deep red and a band in the yellow-green. Vanadium-bearing stones shift the pattern. Both natural and synthetic can show these features, so use only as supporting evidence.
- UV fluorescence. Response varies with iron content. Low-iron, chromium-rich stones (some Colombian) may glow weak red; many others are inert. Some synthetics also glow. Treat as a minor clue.
- Specific gravity. Emerald is ~2.72. Helpful for separating from glass or other simulants, not for origin.
Fillers and treatments: do not confuse them with origin
Most natural emeralds are clarity-enhanced with oil or polymer. Lab-grown stones can be treated too, but need it less often.
- What to look for: rainbow “flash” colors along fractures, tiny surface-reaching fissures that look slightly “wet,” and a pine-needle glow under fiber-optic light where filler sits.
- Why it matters: Filling improves appearance but affects durability and value. It does not prove origin.
- Care tip: Avoid ultrasonic cleaners, steam, and heat with filled emeralds; fillers can leak or turn cloudy.
Common pitfalls and myths
- “It’s perfect, so it must be high-quality natural.” A flawless emerald is more likely lab-grown. Natural high-clarity emeralds are rare and very expensive.
- “It turns red in a Chelsea filter, so it’s natural.” Both natural and synthetic chromium-emeralds can show red. The filter only detects chromium, not origin.
- “Strong color means natural.” Labs can tune color very well. Color alone is not proof.
- “No inclusions means higher value.” For natural emerald, attractive jardin confirms authenticity and origin. Value depends on a balance of color, clarity, and origin, not clarity alone.
When to get a lab report—and what it will say
Get a report when the stone is expensive, unusually clean, or you see mixed signals. A reputable gem lab can:
- Determine origin (natural vs lab-grown) by advanced microscopy, spectroscopy, and trace-element analysis.
- Describe treatments (e.g., “clarity enhanced: oil” or “resin”). Some labs grade the extent of filling.
- Note geographic origin when possible. This affects value but is separate from the natural/lab-grown question.
Why this helps: lab methods detect features invisible to a loupe and compare your stone to reference collections.
Buying tips to avoid surprises
- Insist on clear wording. “Lab-grown,” “lab-created,” or “synthetic” must be disclosed for factory-made emeralds. “Simulated” means imitation, not emerald.
- Ask about treatments. Oil or resin is common. The type and degree affect price and care.
- Use return policies and documentation. Receipts should state origin and treatments. For costly stones, request a lab report.
- Check under magnification before you buy. A 10x view tells you more than a seller’s story.
A practical checklist
- Step 1: Magnify at 10x. Look for three-phase inclusions, diverse natural minerals, or, alternatively, chevron zoning or flux veils.
- Step 2: Rule out imitations with RI and dichroscope. Confirm pleochroism and emerald RI range.
- Step 3: Note any filler flashes. Record treatment indications separately from origin clues.
- Step 4: If signs conflict or the stone is high value, send to a gem lab.
The bottom line: no single clue proves origin every time. But a combination—natural jardin diversity versus synthetic regularity, flux residues or chevron growth, plus basic instrument readings—lets you identify natural emeralds versus lab-grown with confidence.
I am Satyam Pandey, a gemologist with a Diploma in Polished Diamond Grading from KGK Academy, Jaipur. I love writing about jewelry, gems, and diamonds, and I share simple, honest reviews and easy buying tips on JewellersReviews.com to help you choose pieces you’ll love with confidence.